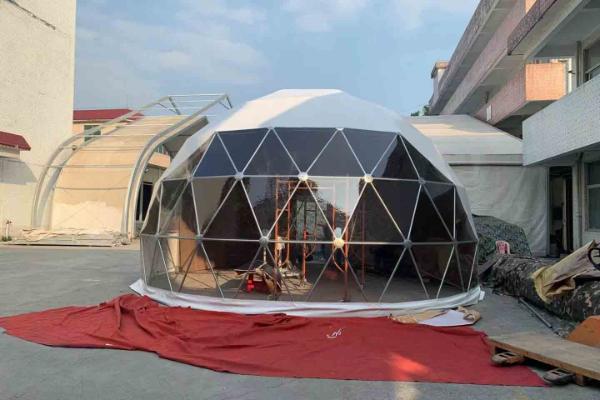
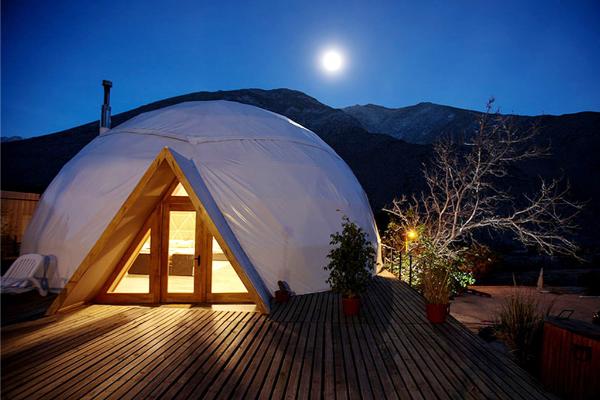
Are you ready to embark on an exciting adventure in construction? Picture yourself in a stunning wooden geodesic dome, surrounded by nature, enjoying the fruits of your labor. If you’ve been dreaming about building your geodesic dome but don’t know where to start, you’re in the right place. Let’s dive in and explore this fascinating journey together!
Building a geodesic dome out of wood may seem daunting, but with the right guidance and a step-by-step approach, it can be a rewarding project. We’ll walk you through the entire process, from understanding the basics to the final touches. By the end of this guide, you’ll be well-equipped to create your wooden geodesic dome.
A geodesic dome is not just an architectural marvel; it’s a symbol of efficiency and sustainability. The unique structure provides incredible strength and stability while using fewer materials compared to traditional buildings. Plus, it’s an eye-catching addition to any landscape, perfect for a glamping site, a cozy retreat, or a unique event space.

What Is a Geodesic Dome?
Before we dive into the construction process, let’s understand what a geodesic dome is. A geodesic dome is a spherical structure made up of triangular elements. These triangles distribute stress evenly across the structure, making it incredibly strong and efficient. The design was popularized by architect and inventor Buckminster Fuller in the 20th century.
The key to building a geodesic dome lies in its geometric precision. Each triangular element must be accurately measured and cut to ensure the dome’s integrity. But don’t worry, we’ll break down the process into manageable steps.
What Materials Do You Need?
To build a wooden geodesic dome, you’ll need the following materials:
- Wooden beams or planks: These will form the triangular elements of your dome. Choose high-quality, durable wood to ensure longevity.
- Connectors: Metal or wooden connectors to join the beams at the vertices of the triangles.
- Fasteners: Screws, nails, and bolts to secure the connectors and beams.
- Tools: A saw, drill, measuring tape, level, and other basic carpentry tools.
For detailed specifications on the materials, you can check out this guide on choosing the right wood for construction.
Step-by-Step Guide to Building Your Wooden Geodesic Dome
Step 1: Design and Planning
The first step in building your geodesic dome is designing the structure. You’ll need to decide on the size of the dome and the frequency of the triangles. A higher frequency means more triangles and a smoother, more spherical shape.
You can use online tools and software to help with the design. There are several free and paid options available, such as Dome Calculator, which can assist in generating the necessary measurements and angles.
Step 2: Cutting the Wooden Beams
Once you have your design, it’s time to cut the wooden beams to the required lengths. Precision is crucial here, as even a slight error can affect the entire structure. Use a saw to cut the beams according to the measurements provided by your design software.
Make sure to mark each beam with its corresponding triangle to avoid confusion during assembly.
Step 3: Assembling the Triangles
With all the beams cut, you can start assembling the triangles. Lay out three beams to form a triangle and use connectors and fasteners to join them at the vertices. Repeat this process until you have all the triangular elements ready.
Step 4: Constructing the Dome
Now comes the exciting part—constructing the dome! Begin by laying out the base triangles in a circular pattern. This will form the foundation of your dome. Secure the triangles together using connectors and fasteners.
Next, start adding layers of triangles, working your way up to the top of the dome. Ensure each triangle is securely attached to its neighbors. This step requires patience and attention to detail, but the result will be worth it.
Step 5: Adding the Covering
Once the wooden framework is complete, you can add a covering to your dome. There are various options available, such as polycarbonate panels, fabric, or even wood planks. Choose a covering that suits your aesthetic and functional needs.
For more information on choosing the right covering for your geodesic dome, check out this comprehensive guide.
Step 6: Finishing Touches
Finally, add any finishing touches to your dome, such as doors, windows, and interior features. Customize the space to fit your needs and preferences. Whether you’re creating a cozy glamping tent, a unique event space, or a personal retreat, the possibilities are endless.
Why Build a Wooden Geodesic Dome?
Building a wooden geodesic dome offers several benefits:
- Strength and Stability: The triangular design provides exceptional structural integrity, making the dome resistant to strong winds and heavy loads.
- Efficiency: Geodesic domes use fewer materials compared to traditional buildings, reducing costs and environmental impact.
- Aesthetics: The unique shape and natural wood create a visually stunning structure that blends seamlessly with the environment.
- Versatility: Geodesic domes can be used for various purposes, from glamping tents and event spaces to personal retreats and greenhouses.
Frequently Asked Questions
How long does it take to build a geodesic dome?
The time required to build a geodesic dome depends on the size and complexity of the structure, as well as your level of experience. On average, it can take anywhere from a few days to several weeks.
What is the cost of building a wooden geodesic dome?
The cost varies based on factors such as the size of the dome, the quality of materials, and whether you hire professional help. A small to medium-sized wooden geodesic dome can cost between $5,000 and $20,000.
Can I build a geodesic dome by myself?
Yes, it’s possible to build a geodesic dome on your own, especially if you have some carpentry experience. However, having a few helping hands can make the process easier and more efficient.

Conclusion
Building a wooden geodesic dome is a challenging yet rewarding project that offers numerous benefits. With careful planning, precise measurements, and a step-by-step approach, you can create a stunning and durable structure that stands the test of time. Whether you’re looking to enhance your glamping site or create a unique personal retreat, a geodesic dome is an excellent choice.
Remember, the key to success lies in attention to detail and patience. So, roll up your sleeves, gather your materials, and get ready to build your very own wooden geodesic dome!
If you’re also interested in the hot-galvanized steel structure of geodesic domes, please don’t hesitate to reach out to us!

